"We dont fight... we beat bitches up!"
Thursday, March 27, 2008
Wednesday, March 26, 2008
The Spot
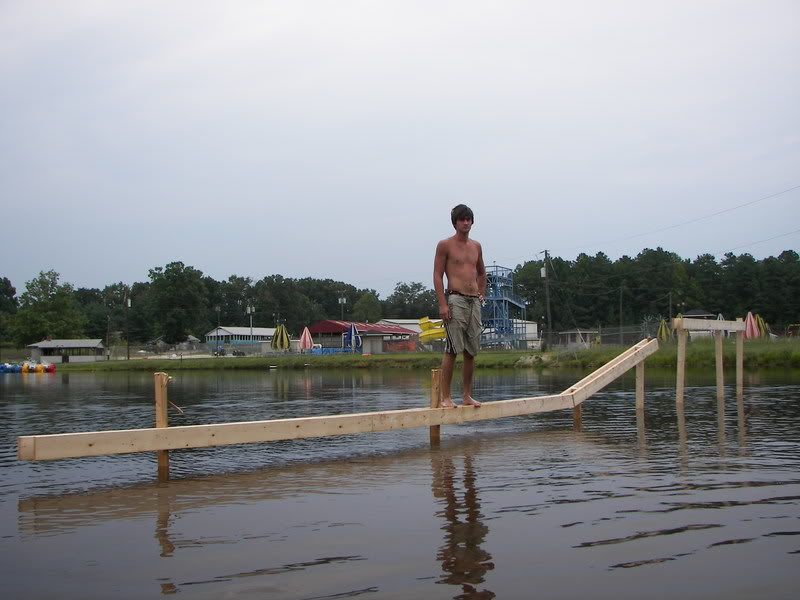
It took a lot of driving around and headache before we were finally able to find a spot without any hassle. We ran into a lot of people that were sent to kick us out of where we were riding, yet everybody seemed to be more interested in what we were doing rather than upset. We had a lot more trouble finding a spot then we thought we would when we first set out. It was hard to find a spot that had low drive by traffic, a clear coast to walk around, non toxic, clear of rocks and logs, where nobody would care about the construction of a rail, and enough depth to not die when you crash. Other than driving around searching, you could try a program from Google called Google Earth. It works really well and is a good tool. Good Luck.


The Build

Engine- $160
6.5 HP Honda knock off horizontal shaft engine with a 3/4" keyed shaft
We ordered this from Etools and More on Amazon.com. They had the engine listed as a 5/8" key type but it turns out it was really 3/4" which works best with most of the parts more commonly used with winches. The engine was $120 and shipping was $40. We had the engine in 3 days and have not had a problem since. We were told that if we ever have any problems that this engine worked with all similar Honda parts. Our 6.5 Hp engine has proved to be more then enough power for everything from dock starts to deep water starts where the rider is completely submerged before be pulled to the surface. We have not only been able to achieve fast starts which are good for short pools but more then enough top end speed which can be achieved quickly. We used a small diameter tube from the hardware store to extend the length of the throttle control for easier and smoother control and have plans to implement a throttle cable.
Product details:(I'm going to go ahead and put these stats from the page I bought I bought this engine, but like I said the daft was labeled 5/8" and it was really 3/4" so I'm not sure if these stats are correct.)
Single Cylinder, Four-Stroke Gasoline Engine
Max torque: 1.35 kg-mm @ 2,500 rpm
Overall dimensions: 16.9L x 153W x 13.8H
Max power output: 6.5 HP @ 3,600 rpm
Starting Method: Recoil Starter
Link: Engine
Link: Poll: What Horsepower works?

Torque Converter-$170
Comet Industries Torque Converter Kit 12 Tooth 40/41 pitch 3/4in. Bore
The torque converter allows the engine to idle without engaging the spool. Some people use a centrifugal clutch system but this belt driven system seems to be very popular. They make for smoother faster starts. Centrifugal clutch systems also seem to have a harder time with deep water starts, from what I have read, where this belt driven system has no problem.We picked up our torque converter from a Northern Tool store hear us. Comet makes several different models to work with several different type of engines. They come with different shaft diameters, number of teeth and pitches on the sprocket. It is important to make sure the bore on the TAV unit matches the shaft on your engine. At this point you need pay attention to the pitch of the sprocket you get because the chain and sprocket need to match. I was told #35 pitch is easier to find but Northern Tool and Equipment seemed to only have #41 pitch. Just make sure your consistent.
Complete Unit Model Numbers:
Order #:218352A Model #:Tav2 30-755P Description: 12 Tooth 3/4" Bore
Order #:218353A Model #:Tav2 30-75 Description: 40/41 Pitch 10 Tooth 3/4" Bore
Order #:218354A Model #:Tav2 30-100 Description: 35 Pitch 12 Tooth 1" Bore
Order #:218355A Model #:Tav2 30-100 Description: 40/41 Pitch 10 Tooth 1" Bore
Our design has the torque converter pointing at about 4 o'clock. The hole pattern on the inside panel of the torque converter allows for it to be mounted at numerous positions. When mounting the torque converter you many run into a slight problem getting the dipstick on your engine to clear one of the fins on the back side of the torque converter. This is normal and can easily be fixed by shaving that single fin down. This will block this dipstick from ever being used.My engine like most have another dipstick on the opposite side that can be used.
Product details:
Belt and two variable pitch pulleys work together as a clutch and variable transmission.Weatherproof system is completely mechanical and can be mounted in any position. Unique design allows automatic infinite variation and smooth shifting action between the systems high and low range in response to changing loads and travel conditions. Maximum 8 HP.
NOTE: Briggs & Stratton changed the bolt pattern on some 8 HP engines, so you may need to make an adaptor to fit these converters to your application. U.S.A.
Link: Torque Converter
Link: Comet Industries


Drive Chain-$20
10' of 41 pitch drive chain.
The chain connects from the sprocket on the torque converter to the sprocket on the spool axle. It is important to make sure the pitch on the chain matches the pitch on your torque converter. Comet's torque converter comes in 35 and 40/41 pitch. We picked this up at Northern Tool and Equipment
Product Details:
Link: Drive Chain

Sprocket-$15
54 tooth 41 pitch sprocket
This sprocket is what rotates the axle the spool sits on. It also allows for sprockets to be interchanged to achieve a desired pull. Again, it is important to remember to match the pitch of the chain to the pitch on the sprocket. We stayed with a 41 pitch. We picked a 54 sprocket really because it was the only 41 pitch sprocket that Northern Tool and Equipment had in stock. This turned out to be a good thing because the ratio between the 12 tooth sprocket on the torque converter and the sprocket on the axle.
Product Details:
54-tooth takes #41 chain. 8 3/4in. O.D., 2in. center hole.
Link: Sprocket


Hub-$15
The hub is the adapter that attaches the 54 tooth sprocket to your axle your spool sits on.It is important to make sure the hole pattern on the sprocket you chose lines up with the bolts on the hub. The hub attaches using not only set screws but small square "keys" that line up with the grooves on the hub and the 1" keyed axle. We found this at Northern Tool and Equipment with the rest of the go kart accessories.
Product Details:
Four-holes; 1 in. bore with 1/4 in. key way. Use with our sprockets on live axles.
Standard 2 13/16 in. bolt kart spacing. Fits rims #1340-1341
Link: Hub (Look under accessories for the sprocket)

Axel-$45
1" Keyed axle
We also found this at Northern Tool and Equipment in about 3' lengths and can be cut to
size with a grinder. The keyed grooves allow for small square keys to interlock other parts such
as sprocket hubs and brake components to the axle.
Pillow Block Bearings-$15
2 1" hydraulic pillow block bearings
These bearings are used to attach the 1" axle to the frame. The axle attaches to the bearings using set screws. We searched for these at Northern Tool and Equipment but were unable to find anything we liked. We went on there website and were able to find there pillow block bearings at a good price.
Product Details:
Top quality, advanced seals prevent leakage and keep out dirt. Two set screws to fasten bearing to shaft. Self-aligning. Solid cast housing. Interchangeable with most other makes.
Link: Pillow Block Bearings


Spool-$265
Released Winching Spool
We ordered this spool after all the amazing reviews we found online about it. After taking more then a month to receive which was blamed on everybody being on vacation in March and $45 worth of shipping cost, we have it all put together and are loving it. The interchangeable inner diameter allows for different amounts of lengths of rope and slight drive ratio adjustments. It is very lightweight and clean looking. It's small width makes it easy to find room for on your axle and the tall walls ensure your rope will stay on your spool. When pulling your line out you will find that the tension created by your torque converter will be enough to wear you out in less then an hour. This is the best feature of the Release Winching Spool. It allows you to disengage your spool from your axle with the ease of a pin removal. This allows your spool to let out rope much more freely. A must. This is also one of the most difficult parts of the build. This calls for a hole to be drilled through the 1" axle for the pin to run through. Not hard but not easy.Make sure everything is mocked up and lined up before drilling this hole. You only want to do it once...
Product Details:
CNC machined winch spool with adjustable inner diameter. This spool fits a standard 1" axle.
Fits standard 1" axle
15" outside diameter
Adjustable inside diameter 4", 6", 8"
Link: Spool

Rope-$175
600' of bulletline rope
Unlike other rope that may have give or bungee this line is non stretch and very lightweight.This makes the line much more responsive and eliminates the bungee effect which can make riding tricky. It also floats. We purchased this line online through Bullet ski Line's website.Comes in 600' lengths for $175 or 1000' for $300. They do offer free shipping but I have a feeling the price might just be built into the price. Great rope though.
Product Details:
Coated spectra winch rope with unprecedented abrasion and UV resistance.
Link: Rope

Fairlead Roller-$50
This is simply a cluster of rollers that feed the rope to your spool ensuring the line hits the spool and not your axle. This also cuts down on friction that could cause damage to your expensive line. Norther Tool and Equipment did carry these but we were able to find it about half price on Ebay.
Product Details:
When using the winch at an angle, the roller fairlead guides the wire rope onto the winch drum. It helps extend wire rope life and keeps rope from building up on one side of the drum.
Link: Fairlead Rollers


Frame-$220
We used 24' of 3/16" thick 1.5" square steel tubing. This was about $60. We found a neighbor that we somehow managed to talk into fabricating our frame for $100 and $10 worth of beer. He did a really good job and was money well spent. The frame attaches to our truck's hitch using a $50 hitch mount we found at Norhtern Tool and Equipment. We arranged this piece so the entire winch can sit under an open tailgate.You might want to look into a pin that locks into your hitch so your $1000+ winch that is sitting on the back of your truck dosent walk away. The only mistake we made was having the arms that hold the fairlead rollers don't allow a lot of room for adjustments as far as adding a larger sprocket.Luckly the 54 tooth sprocket fits and works. We might change these arms to come straight out.


Monday, March 24, 2008
In the begining...
We first started winching, when our only source of a boat was ruined thanks to a bent prop. It may have only been a john boat but it did the trick.


We ran into people winching on YouTube and looked it up online. We came across a picture of a mini bike set up on a wooden stand and happen to have a four wheeler sitting next to us. After a few prototypes we figured it out and were actually able to get an extremely consistent pull which kept us busy all summer.


The only real problem with this setup was everything. Every time we wanted to go winching we would have to unload the truck, pull out the four wheeler, load it up, set up the stand, and so on. This was very labor intensive and time consuming. To top it off we had to do the same thing once we were finished riding. All and all, it was fun but nowhere close to ideal. We decided we needed a real winch before next summer. We looked at a lot of different styles and setups.


These website were very helpful but we found ourselves really having to piece together information to figure out the whole design and logistics behind these amazing devices. That is when we decided we would document our whole experience and share it in hopes of helping others. So here is our story.
Subscribe to:
Posts (Atom)
